Firstly, I opened up the image I wanted to edit in photoshop.
Next, I clicked the circular button which is situated in the bottom right corner of the page, it looks like this:

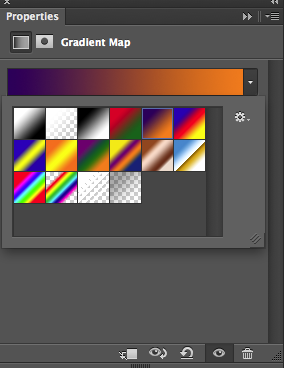
After this I selected the 'gradient map button' and the following menu appeared:

I then selected the drop down arrow at the end of the gradient map, this then gave me a selection of ready made duotones, I then selected the orange to blue one, which then changed the menu to the following:
By then clicking on the gradient bar itself it gave me a menu whereby I could vary the intensity of the colouring, whilst also being able to change the colours that were involved in the duotone originally, the following image is the menu which I used to do this:

The little square draggers on the coloured gradient bar change the lightest and darkest points in the image, these are what I used to adjust my image. To change the colouring you must click on the coloured square where it says 'colour' and then a box (shown below) comes up where you can select the specific colour you would like.

Once I was happy with the colours I had selected, I then clicked 'OK', I also then edited the curves within my image, to do this again you click on the circular button in the bottom right hand corner of the screen, and then select 'curves' whereby the following menu will appear:

I then dragged the line up, or down to change the curves within the image.
Below is my final image:

I used purple and yellow colouring within my image, as I believe these colours contrast each other sufficiently. The purples in this image help bring out the darker shadows within the image which make the pepper appear more abstract, and surreal. I believe this editing technique would work well if you wanted your images to become more fun or to have a 'pop art' look, due to the bright colouring you can use within the images.
No comments:
Post a Comment